Complete Pack Verification
Pack Verification allows users to verify the contents of a shipping container, review relevant instructions, set the container type and dimensions, print manifest, labels, attachments, and/or reports, and add accessorial charges.
Note
Steps for Pack Verification vary based on the needs of your organization. Optional steps may include instruction review, shipping manifest review and printing, report and label printing, and adding accessorial charges.
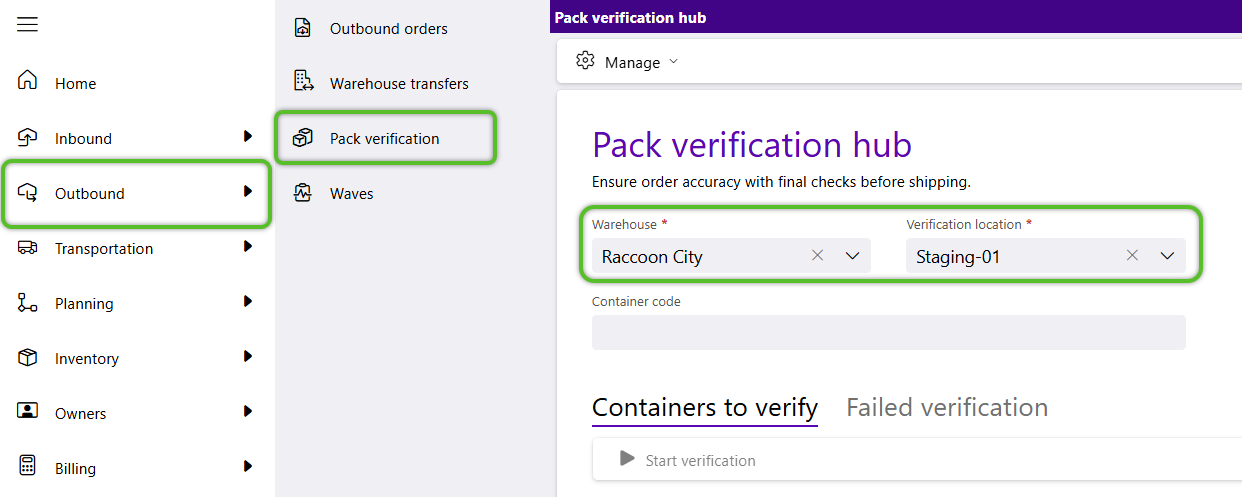
1. Click Outbound in the left navigation menu, then click Pack Verification.
The Pack Verification Hub will display with the user's Warehouse populated, select a Verification location.
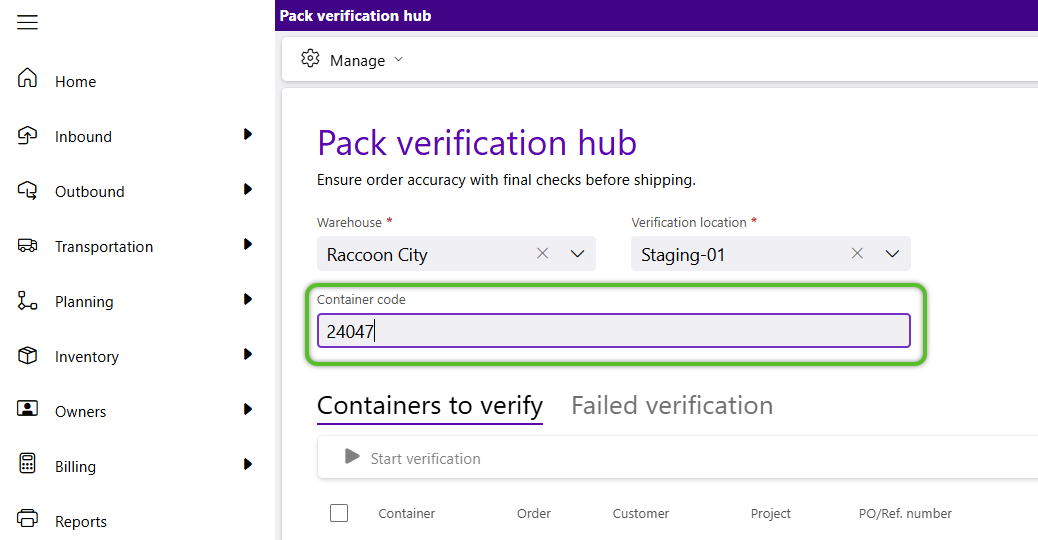
2. With your cursor in the Container Code field, scan or enter the Container Code to begin Pack Verification.
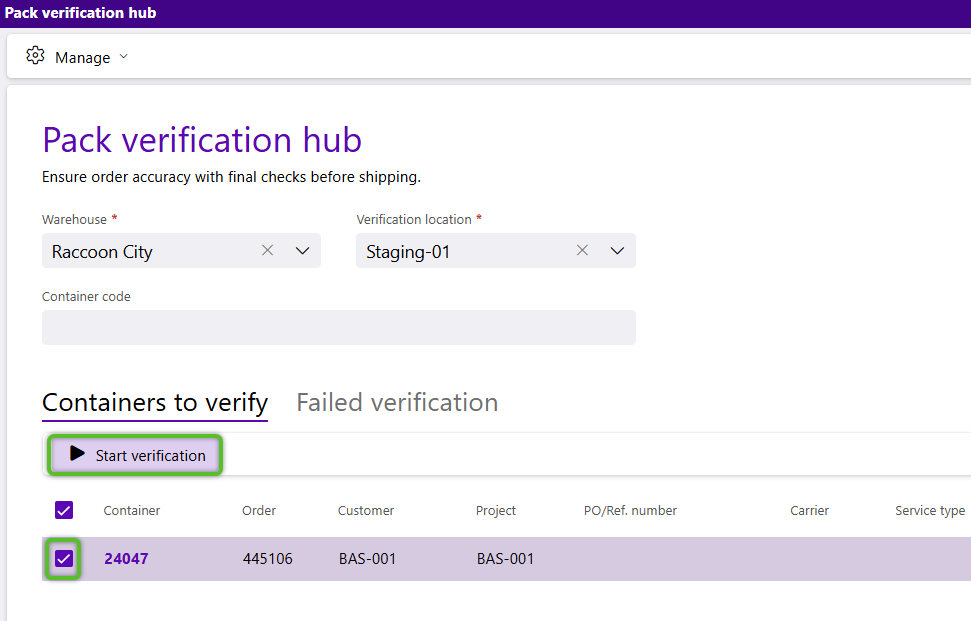
Alternatively, locate the Container Code in the Containers to Verify tab, check the box to the left, and click Start Verification in the menu.
Note
Initial Pack Verification is done blind, meaning the user will not see the details to be verified. When Pack Verification fails, the details to be verified will be revealed to users for reverification and management.
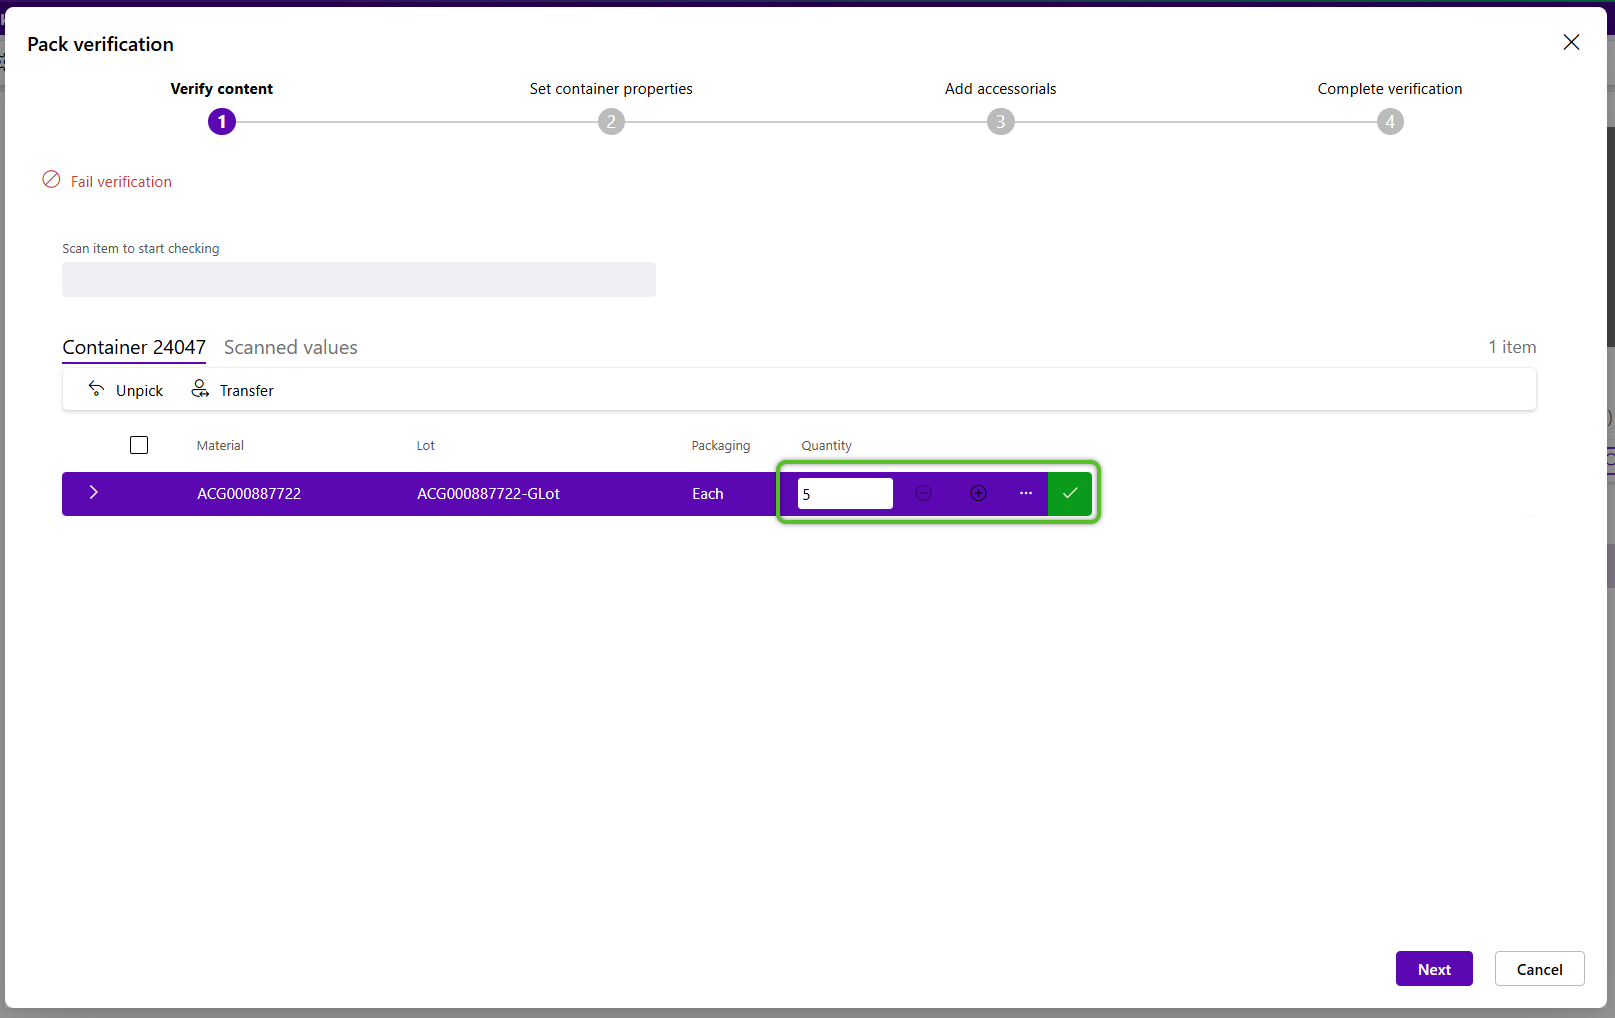
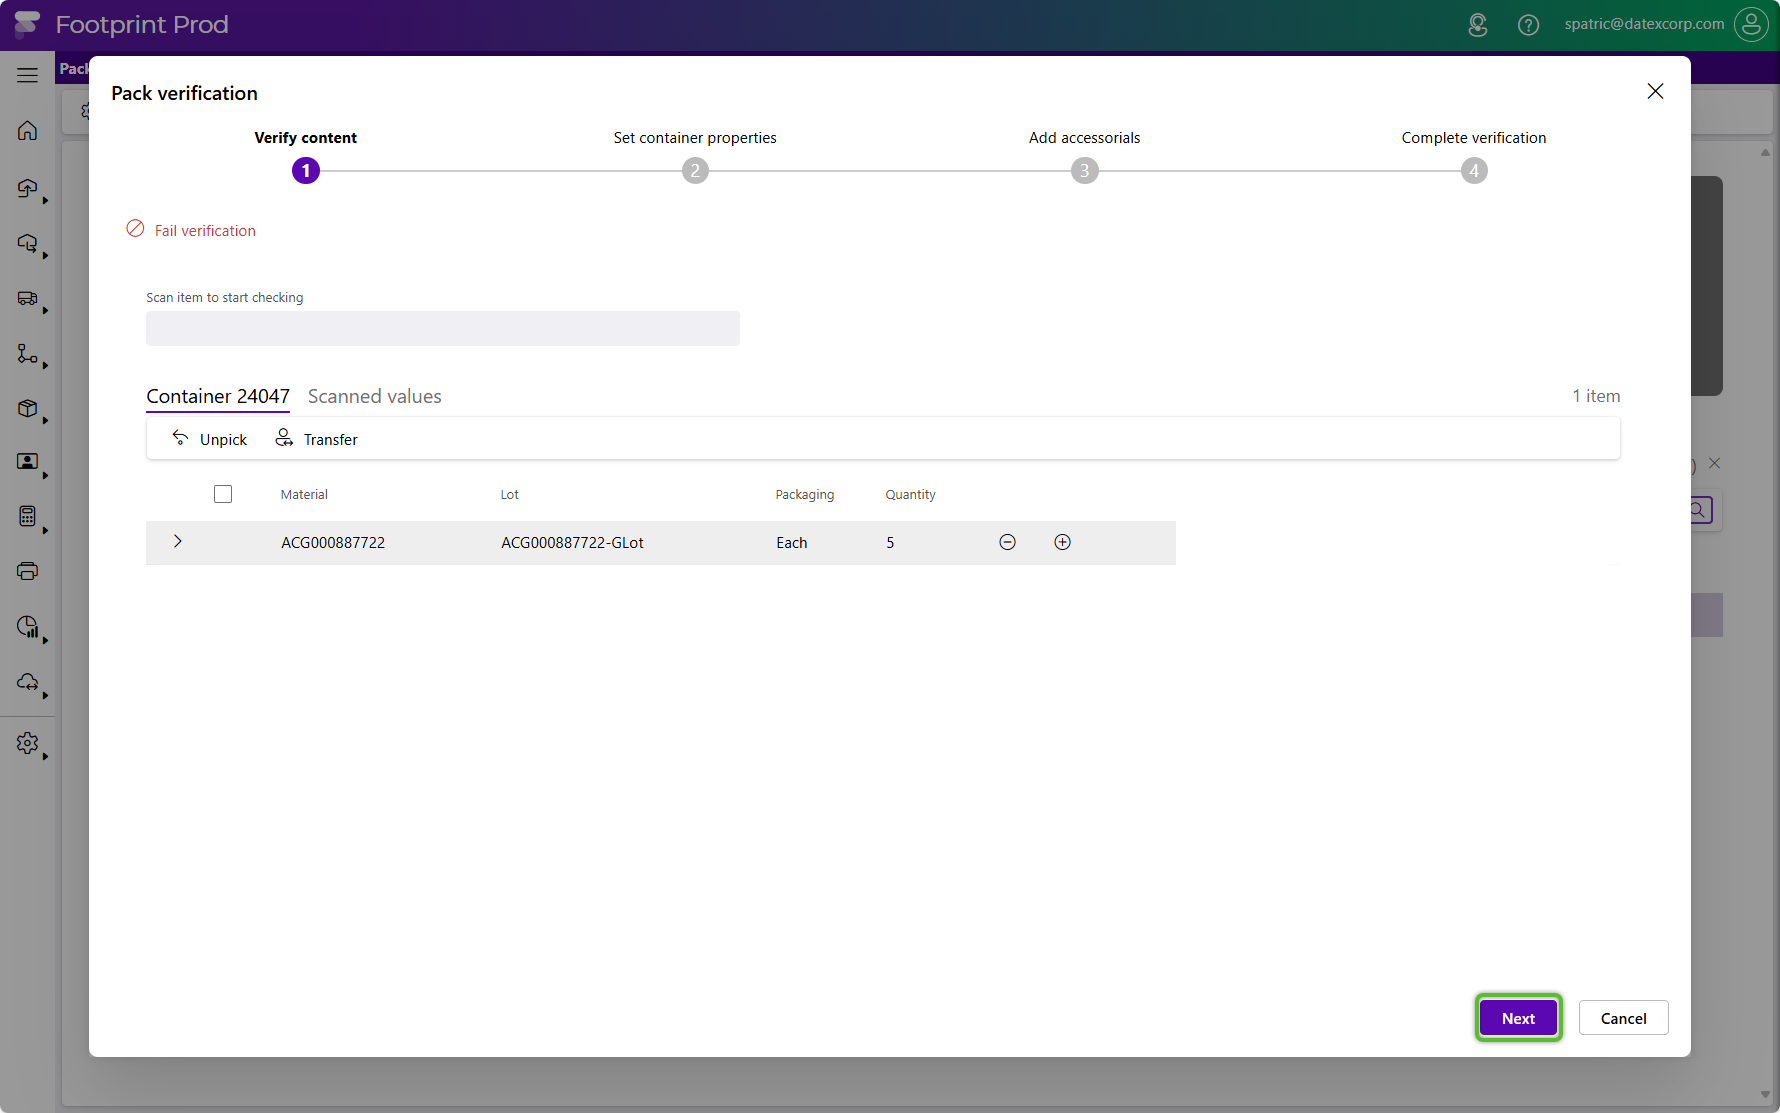
In the Pack Verification window, the first step is to Verify Quantity. Inventory for the selected Container will be listed in the Container tab, then will move to the Scanned Values tab after verification.
Note that the Fail Verification option is available for each step in the process.
4. Scan (or select) Inventory to begin verification.
5. Alternatively click the + plus icon in the right column to increase the Inventory quantity verified, or click to enter the Verified Quantity and then confirm by clicking the checkmark.
Some organizations will opt to display Instructions related to the Container.
6. Click the Next button in the bottom right to proceed to the next step.
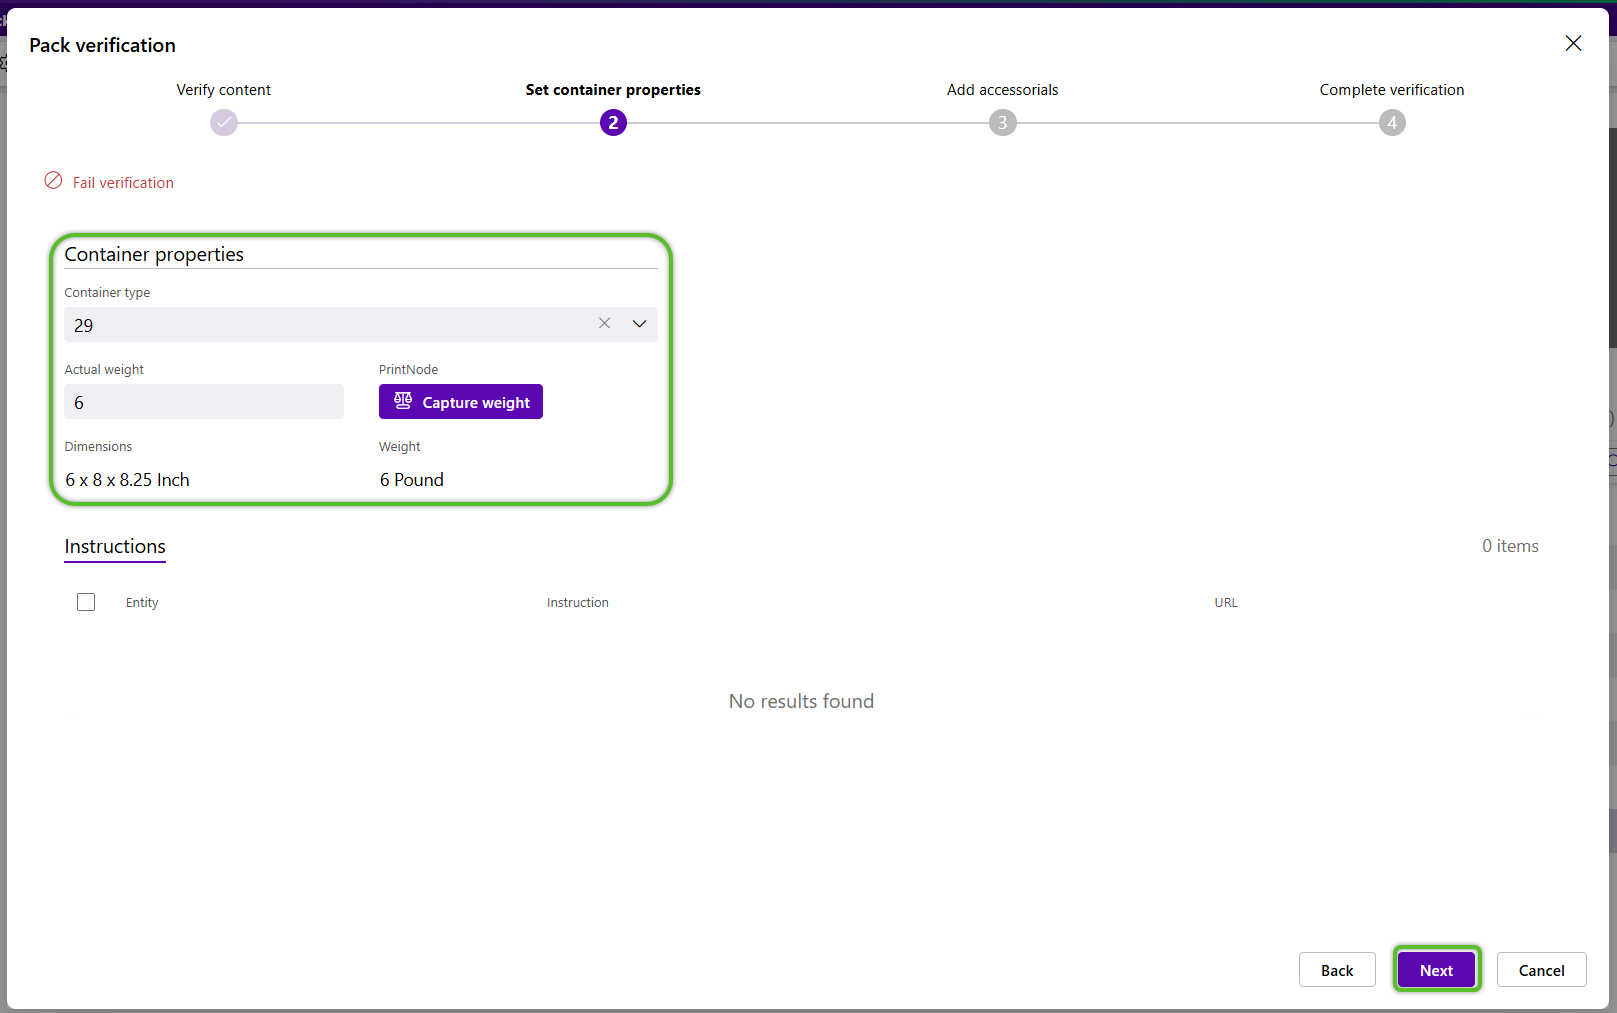
7. In the Container Properties section, if necessary, select the Container Type.
The container Dimensions and Weight populate based on the selected Container Type.
8. Enter the Actual Weight verified.
Some organizations will require Pack Instructions to be checked before being able to proceed.
9. Click the Next button to proceed to the next step.
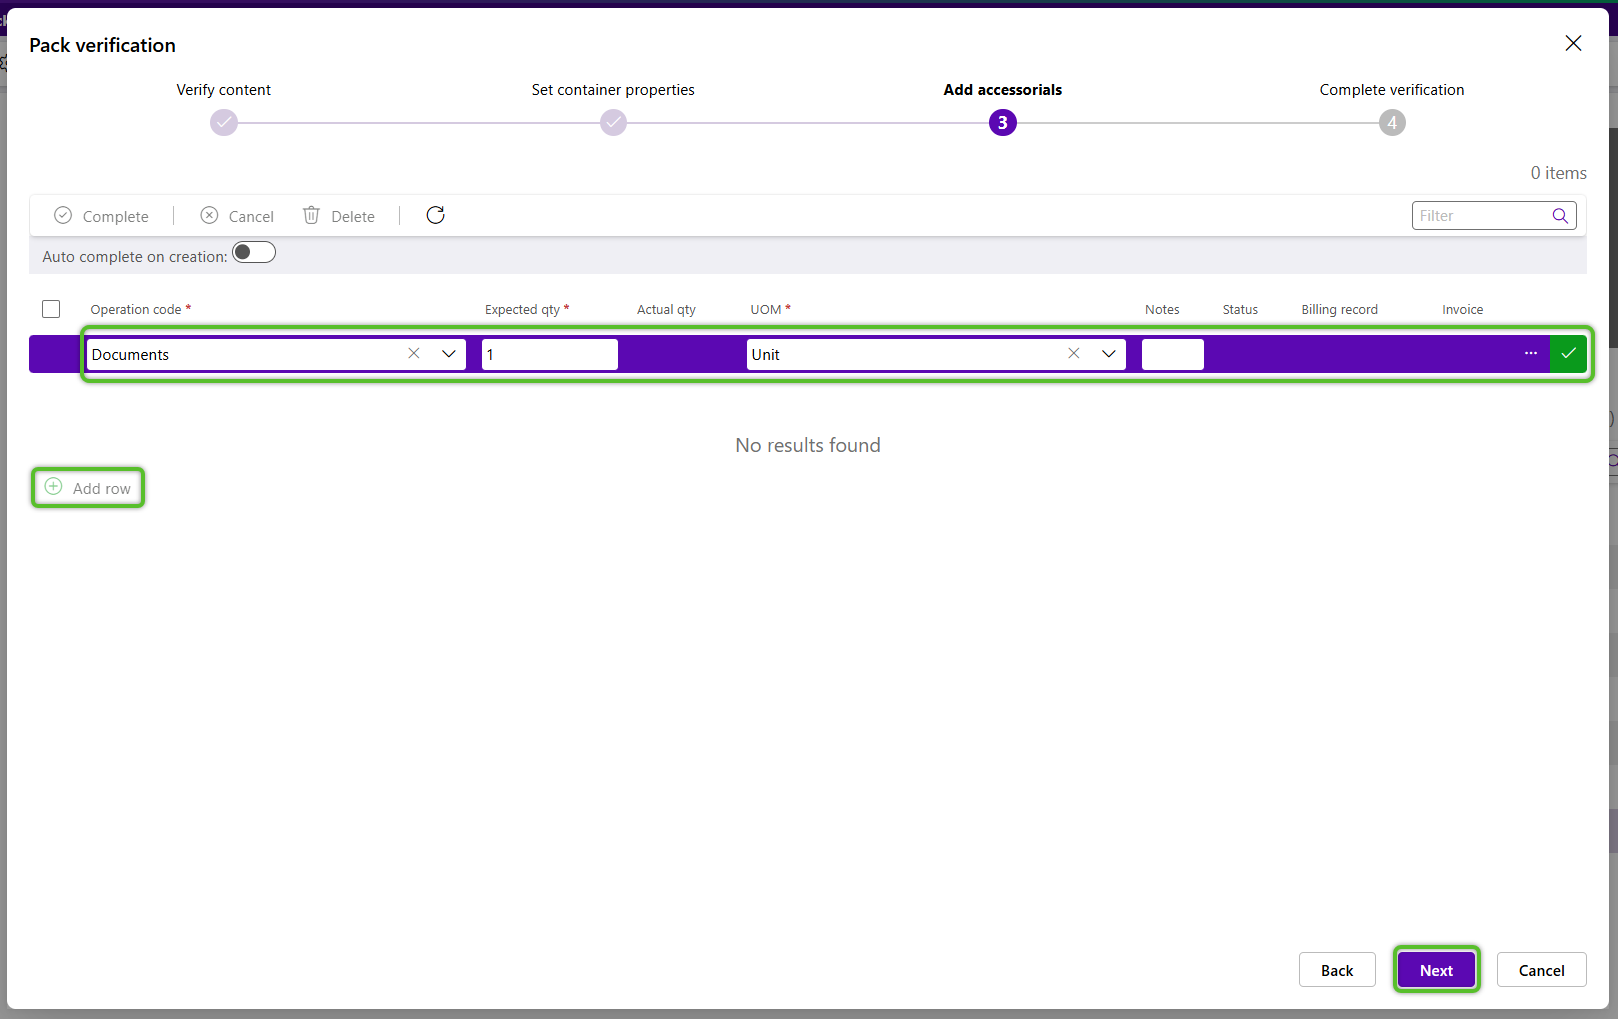
In the optional Add Accessorials step, Accessorials are added by adding and completing tasks.
10. To add accessorial charges to the Container, click the green +Add Row option.
11. Select the Operation Code, enter the Quantity and UOM, then click the green check mark.
12. Click the Next button to proceed to the next step.
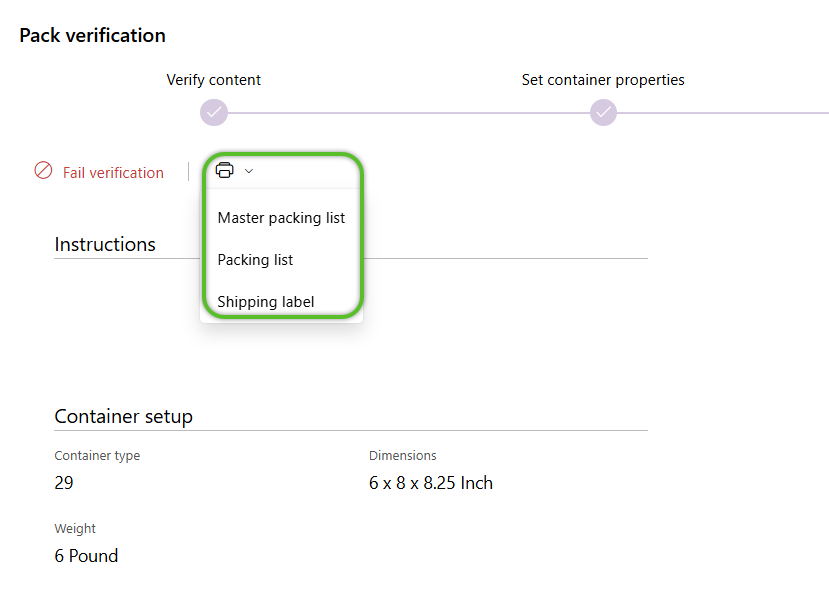
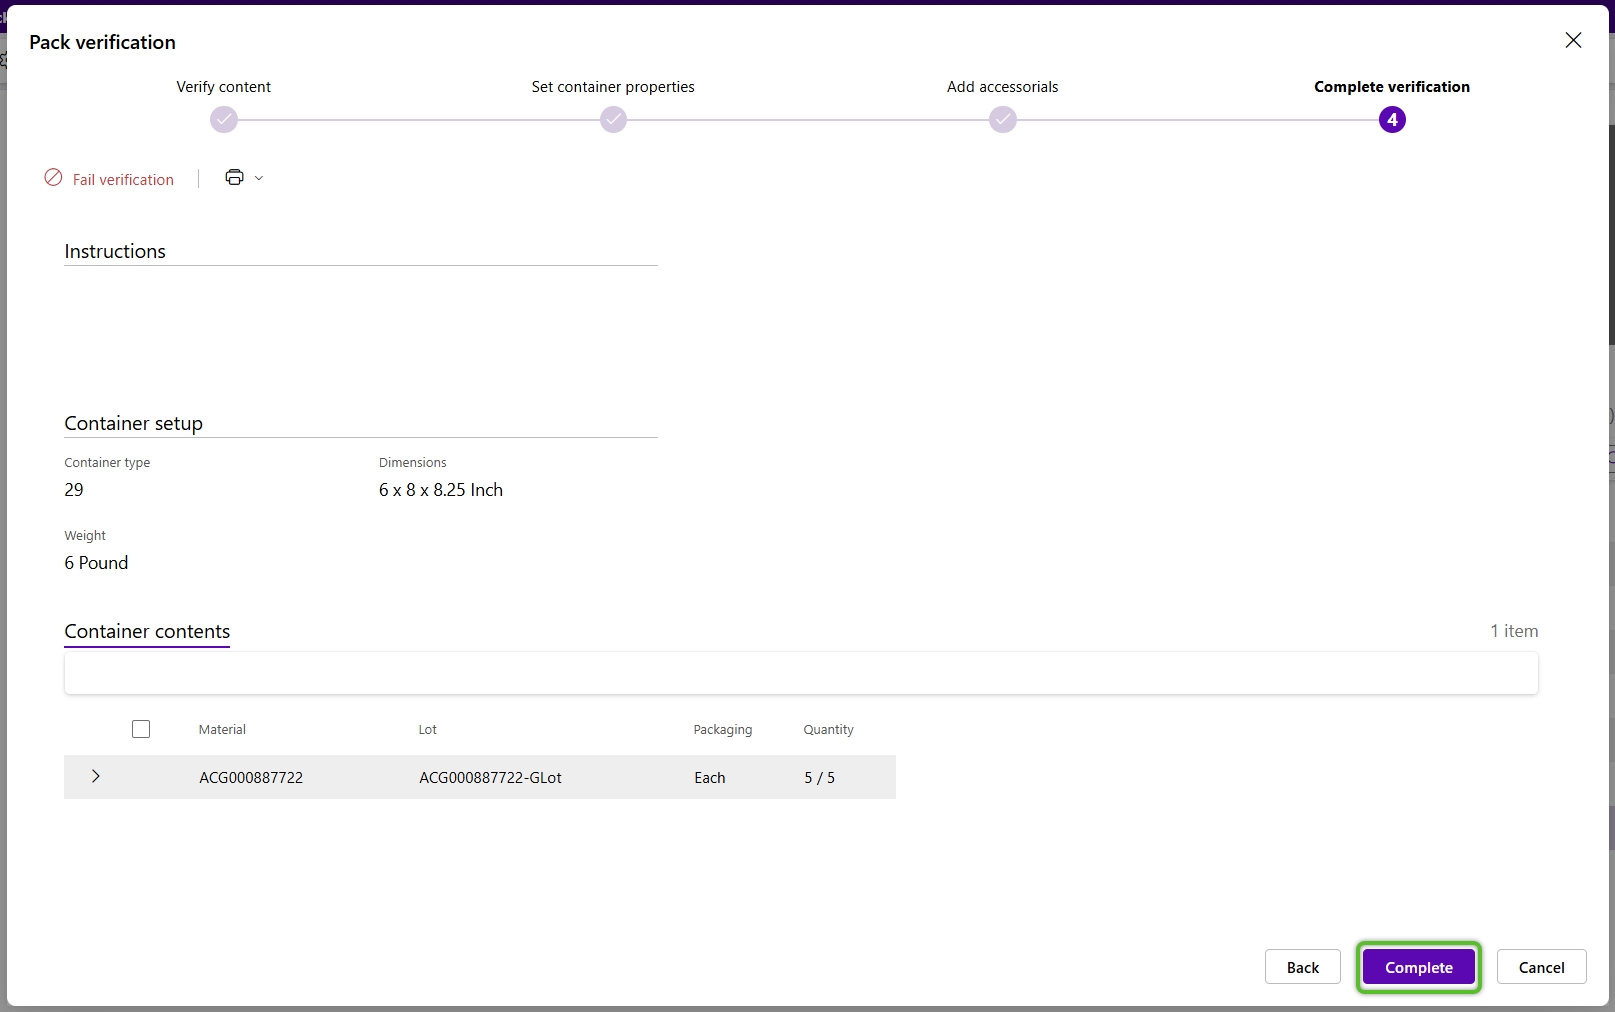
The final Complete Verification step (some organizations may have 5 or 6 steps) is read-only.
13. Review any applicable Instructions and ensure the Container Setup details are correct.
14. In the Container Contents tab, ensure the Verified Quantity shows that 100% of the materials have been verified.
15. Print any labels, reports, the manifest, the packing slip, Attachments, or other related documentation.
16. Click the Complete button.
| Last Updated: |
| 08/12/2025 |
Copyright © 2026 Datex Corporation